Friday, February 3, 2012

BILLS, BILLS, BILLS!!!

In our family, John pays our bills.  He's just always felt like that was part of his "husband duty".  
Johns system for paying the bills was pretty simple, a couple times a month, he would take the pile of bills & other mail, pay what needed to be paid of them, and put the rest of the pile back where he found it.  We had piles of mail on our microwave & table at all times! I HATE piles!
So, I finally got desperate and decided I was going to find some sort of mail system that would work for the both of us... and here is what I came up with! : ) 
The "mail system" is pretty much as easy as can be! I went to the store and bought a binder & binder tabs with pockets.  Then, I started labeling, created a couple documents, put the mail in the right pocket, and DONE! : ) 

This is what you see when you open the binder.  I'm obnoxious and find indexes necessary.  


The first page is our "Bill Payment Organizer".
The top chart has all of our automatic payments in it.  We have quite a few payments that automatically come out of our account, I used this section to list their total & date.
The bottom section is bills that come to us by mail.  When bills come in the mail, I open them & throw away all the extra junk they put in the envelope, write down the date & total the bill is due, and put it in the appropriate pocket.  This way, when John opens the binder he can easily see what is due when & to who.

Each month I print out a calendar and put it in the binder.  When bills come, I write the name of the company & total in the calendar on the date it's due.  Every so often, John or I can look at the calendar and see what's due within the next couple days.  I highlight anything that is automatic so we know we don't have to worry about paying that.

And these are all the tabs! : ) (I might have gotten a little carried away).  I have two tabs for bills.  One for bills that are due by the 15th of the month, and one for tabs that are due by the 30th of the month.  The rest are tabs for things like our mortgage (any papers applying to our mortgage goes in this file), our bank account (statements, etc.), Johns notes (anything of his that I don't want to throw away), etc.

So, that's my mailing system.  Not the cutest or most exciting... but it works great for what it is! : ) 

Thursday, January 26, 2012

Breakfast is ready!!

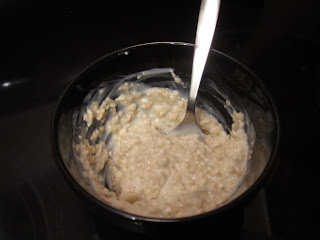
Just about every day, I eat the same thing for breakfast (and sometimes for a late night snack... I like it, don't judge me! : )).  Why?  Because it's yummy... it's easy... and it's healthy! : )
 All you need is a bowl, a spoon, some plain yogurt (all natural is great, if you have it! I'm a bit overdue on my Trader Joe's run..), some raisins, and some oats.

Pour the yogurt into a bowl (I'm pretty sure I could have left this step out...) 

Add some oats.  You can add as much as you want... I like mine kinda thick.  

Add some raisins.  Again, add as much as you want! 

And breakfast is ready!  A yogurt mix, some coffee (cause my momma raised me that way), and a juice (which is a WHOLE other post... but I'll get there soon enough)!!  Breakfast doesn't get much better than that! OK, it does, but let me try to fool myself! : ) 


On a completely unrelated note, wittle bit got a hair cut! 

Wednesday, January 25, 2012

Sparkling up the Kitchen... a little baking soda at a time!

Today I discovered an AMAZING trick (thank you, Pinterest)!! I've been feeling like my stove & sink were impossible to get "new looking" and shiny again... but I was WRONG (and never so happy to be wrong!)!!
All you need is some baking soda, dish soap, warm water, a large bowl, a towel, windex, and a few paper towels!
Here's what you do...
Take some baking soda and sprinkle it over the surface you are cleaning.  Fill a bowl with dish soap & warm water, and soak a large dish towel in it.  Wring out the dish towel and lay it over the surface you are cleaning.  Let the towel lay over the baking soda for about 5 minutes & then simply wipe the baking soda up! You may have to go over it with the soapy towel a few times to get all the baking soda up.
Spray surface with windex, wipe, and step back and admire the shininess!


Side note: Wear gloves, since the baking soda is a bit harsh on the hands! : )

An American Favorite - APPLE PIE!!

This is SO yummy and SO easy! Delicious with vanilla ice cream - but duh, it's apple pie! : )
You can either use store bought crust or make your own. Last night I just used store bought because I needed a new pastry blender, and didn't have time to go get one. It's delicious with store bought crust... but I prefer to make my own (just because it makes it more homemade). I have a good (and simple) crust recipe that I can add later.
Pie filling:
1 stick butter (1/2 cup)
3 Tbs. all purpose flour
1/4 cup water
1/2 cup white sugar
1/2 cup packed brown sugar
1 tsp cinnamon
7 Granny Smith Apples

- Preheat oven to 425 degrees.
- Peel, core, and slice 7 Granny Smith Apples. Place apples in large bowl.
- Melt 1/2 cup of butter in saucepan on oven. Add 3 Tbs. flour to form a paste.
- Mix white sugar, brown sugar, and water. Add sugar & water mixture to the saucepan.
- Bring saucepan mixture to boil. Lower temp. and allow mixture to simmer.
- Pour mixture over apples & stir.
- Place bottom crust in pie pan. Pour apples into pie crust. Place top crust over apples in either lattice form or just layed over.
- If just layed over apples:
Cut slits in top. Trim excess off sides. Bunch top and bottom crusts
together.
- Bake in preheated oven (425) for 15 minutes. Cover crust with foil, reduce temp. to 350 and bake for 35 more minutes.

The World's BEST cleaning product!

Ok, ok... so maybe that's a bit of an exaggeration... but this cleaning product is FOR REAL amazing!
Over the past week, I have been hit by... well, you might call it Spring Cleaning, but at this point, I call it INSANITY! : )
I all of a sudden felt the need to clean EVERY INCH of my house! Seriously.
I'm not sure what hit me, but I hope whoever/whatever it is visits me again! : )

Anyway, through all of my crazy cleaning, the HARDEST thing for me to clean was our shower.  I've always kept it "clean", but decided I was going to SCRUB it and get EVERY last bit of scum & water marks off of it.  Well, after about an hour of scrubbing with a sponge and Scrubbing Bubbles Bathroom cleaner, they were better, but still not gone.  (Our shower is a cream color, and it is near impossible to get looking perfect... seriously!)
Finally, I called it quits! The thing was just never going to look brand new, and I was just going to have to deal with it. 
THEN, John came home from work.  I told him all about how I scrubbed the thing like crazy and nothing would work.  He asked me if I tried the cleaning product under the sink in our other bathroom.  Um, no! Hello, I was using SCRUBBING BUBBLES (which I had always thought was the worlds best cleaning product - I know, I say that a lot! : )).
Well, out of desperation, I decided to try it.  So, I went and got a product called "Ajax Bleach Powder".  A product that looks like it cost all of 2 dollars.  I shook some out on to our shower, let it soak for a bit, and scrubbed it again.... and the scum/watermarks literally RUBBED OFF! No elbow grease was needed at all... and my shower looks like new! : )
Seriously, stop reading this and go buy it NOW! It will make your shower cleaning SO much easier! : )

Swiss Chicken Casserole

I have to share my ABSOLUTELY favorite chicken recipe!  I'm not the biggest fan of chicken, but add a slice of swiss cheese and some stuffing, and I am LOVE it!

Swiss Chicken Casserole
Ingredients:
6 skinless, boneless chicken breast
6 slices of swiss cheese
1 (10.75 oz) can of cream of chicken soup
1 (10.75 oz) can of cheddar cheese soup
1/4 cup of milk
1 (6 oz) box of Stovetop Stuffing for Chicken
1/2 cup of melted butter
Directions:
Preheat oven to 350 degrees F
Soak the box of stuffing in 1/2 cup of melted butter
Lightly grease a 9x13 baking dish
Arrange chicken breast in the baking dish, so they aren't overlapping.
Place one slice of swiss cheese on each breast (I kind of wrap it around the slice of chicken as much as I have to)
In a medium bowl, combine cream of chicken, cheddar cheese soup, and milk.
Pour soup mixture over the chicken breasts.
Top with stuffing and melted butter.
Cover with foil and bake for 50 minutes (or until chicken is no longer pink and juices run clear)

And, Enjoy! : ) 

Menu Planning & Grocery Shopping

NEVER, if you do now, return to the grocery store without a list again! I promise you, making a meal plan and grocery list is SO easy and will save you TONS of money!

Here's what I do, because it works for me.  Find what works for you and your family, and stick with that.  The more you do it, the easier it'll get. 

I have several documents that I've created in Word & Excel that I use while meal planning.
I start with a document that looks something like this:


Meal Planner
Dates:_________________________________
Agenda Time to Cook Leftovers Main Dish Side Dishes
Monday:
Tuesday:
Wednesday:
Thursday:
Friday:
Saturday:
Sunday:


I know... dorky, right? But, like I said, it works for me! : )
I start by filling in what me & my husband have going on that day in the agenda column (you can't plan your meal if you aren't realistically thinking about what you have going on that day). From that, I fill in the "time to cook" column. 
My husband and I always take "last nights dinner" to work with us for lunch the next day. So, I have to plan for leftovers.  I fill in how much we need for leftovers in the leftovers column (I only work part time, so I don't need a lunch each day). From there, I get to the meal planning...
I keep a running list of meals that I make.  They are divided into categories - Quick & Easy, Semi Time Consuming, Time Consuming, and Crockpot.  Once I know how much time I have to cook each day, I can easily fill in meals in each days box.
Ok, so your meals are planned... Easy, right? Well, it will get easy, I promise!
Next, I keep index cards with each meal I make listed on it.  Each index card has ingredients needed for that meal.  I pull out each index card for each meal I'm making, copy off the ingredients that I need, and TADA, I have the start of my grocery list.
Then, I have a "basic grocery list" (you can find one of these if you do a google search.  If not, ask me, I'll send you mine).  I use this to remember to get items like Paper Towels, Sugar, etc.  I go through that list, mark off what I don't need, and add what I do need to the main grocery list.
Finally, I arrange my grocery list by the grocery store I shop in.  I start with Produce and end with frozen food.  This makes my trip to the grocery store SO easy.  I literally walk through & grab items! It doesn't get easier than that! : )

I know it sounds like a lot of work, but the more you do it, the easier it gets.  AND, it is so worth it! I no longer feel all anxious when I go grocery shopping.  I plan for two weeks of lunch & dinner, and my total is always under $200 (usually around 150). 

So, start meal planning.... : )